Texture Mapping
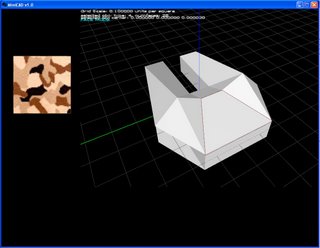
 The texture mapper for the most part is complete. Here's a screenshot of it being started. When the command "tex" is entered, the screen changes perspective to make room for the texture and any accompanying data. The example texture here is called "desertcamo.bmp" and is loaded with the "loadtex" command.
Mapping the texture is fairly simple--first, select an object, then select a face to map to, then switch to point mode. Point mode then enables you to give each vertex a coordinate relative to the texture. To load the coordinate into the vertex, simply click somewhere on the textured square.

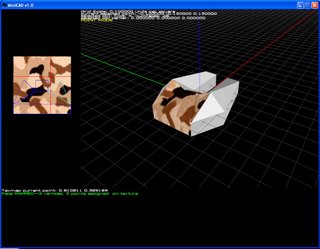
Here you'll see some faces have been textured already. One of the features of the mapper is the ability to mark a face to see what points have been chosen. This, coupled with a crosshair allows a user to finetune where texture coordinates will end up relative to other faces. In the picture, the current mapped face is shown as a light blue wire triangle. The other marked faces are shown in dark blue. On the model itself, the current selected face is shown as a dark red outline if it's marked, and bright green if not (not shown here). Points on the face are shown as small white cubes normally, and are slightly larger light blue cubes if the point is currently selected.
Any additional data about mapping is shown via textual information a third of the way from the bottom of the screen.
This project is almost done. All that is left is to sort out some easily-fixable segmentation faults (unassigned pointers, etc.), setting up the opening/saving commands to include texmap data, adding support for more than one texture on a model, and tweaking some of the functionality and features. Depending on whether I get a wild hair and make something totally different on here, this will be the last update before I release this program as open source.


